Why Is My Laser Tube Not Working?
A laser tube can appear completely dead, yet the tube itself may not be the real cause. A dark workbench, a silent power supply, or a sudden loss of cutting power can point to several different failures. Wiring, cooling, mirrors, interlocks, and control signals all matter.
Theodore Maiman, the inventor of the first working laser, once said, “The laser is a solution looking for a problem.” His observation still fits modern CO2 laser systems. A laser tube does not operate alone. It depends on stable high voltage, correct water flow, clean optical paths, and safe machine controls.
This guide examines why a laser tube may stop working and how technicians can investigate the problem carefully. The first clues are often physical. Look for cloudy cooling water, cracked terminals, loose connectors, or a faint burn mark near the tube. Listen closely, too. A missing discharge sound may suggest a power issue, but it does not prove the tube has failed.
Some diagnoses are surprisingly simple. Others are not. A damaged flow switch can imitate a dead tube. A failing power supply can produce a weak beam. Even an aging tube may still fire briefly, creating false confidence.
A practical inspection should begin with safety and manufacturer instructions. Never touch high-voltage components without proper training and verified discharge procedures. That precaution may feel slow. It prevents serious mistakes.
The goal is not to replace the laser tube immediately. It is to identify the failure logically, protect nearby components, and decide whether repair, testing, or replacement is justified.
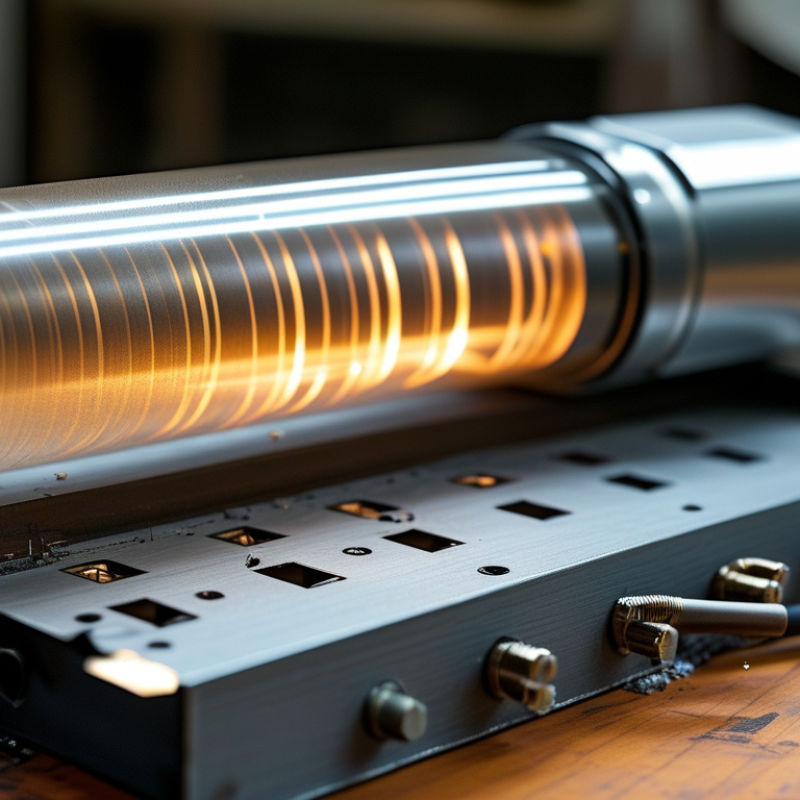
Identify Laser-Tube Symptoms and Map Them to Likely Failure Modes
Why Is My Laser Tube Not Working?
A laser tube rarely fails without clues. A completely dark tube may indicate a failed power supply, an open circuit, or a disconnected high-voltage lead. Check the obvious parts first. A weak beam often points to aging gas, contaminated optics, poor cooling, or incorrect current. If the beam flickers, inspect water flow, tube temperature, wiring, and electrical connections. Never open an energized laser system. Dangerous voltage can remain after shutdown.
Different patterns suggest different failure modes. A bright glow without useful output may indicate internal gas damage or a misaligned optical path. A beam that appears only briefly can result from overheating, unstable protection sensors, or a failing power supply. Cloudy water, bubbles, or rising outlet temperature suggest cooling problems rather than immediate tube failure. A cracked tube or visible arcing requires immediate isolation.
In practical troubleshooting, I record current, water temperature, flow, and firing duration. Small changes often reveal the pattern. I have sometimes blamed the tube too quickly. The real fault was a loose connector or blocked cooling line. Compare readings with the equipment manual, not guesswork. If symptoms remain unclear, a qualified technician should test the high-voltage circuit and tube safely. Parts replacement without measurements can create a second failure.
Why Is My Laser Tube Not Working? — Identify Laser-Tube Symptoms and Map Them to Likely Failure Modes
Diagnostic reference for common water-cooled glass CO₂ laser tubes. Always isolate power before inspection and follow the equipment manufacturer’s safety procedures.
| Observed Symptom | What It Usually Indicates | Likely Failure Mode or Cause | Useful Checks | Recommended Next Step | Priority |
|---|---|---|---|---|---|
| No laser output, no visible discharge, and no sound from the tube | The tube may not be receiving high voltage, or the gas discharge is not starting. | Interlock open, failed power supply, disconnected high-voltage lead, blown fuse, or an open internal tube circuit. | Confirm that the lid, water-flow, and emergency-stop interlocks are closed. Check incoming power, fuse condition, wiring connections, and the power-supply enable signal. | Do not open the high-voltage power supply. Disconnect power and have a qualified technician test the supply and tube circuit. | High |
| The tube produces a normal-looking discharge, but the beam is absent or extremely weak | The electrical discharge is present, but laser oscillation or beam transmission is failing. | Depleted gas mixture, damaged mirror seal, contaminated optics, incorrect current, or a partially failed tube. | Compare the discharge with the tube’s normal appearance, verify operating current, and inspect external mirrors and the focusing lens for contamination or damage. | Clean optics only with approved procedures. If the discharge is normal but output remains low, arrange tube and power-supply testing. | High |
| Laser output gradually decreases over days or weeks | The tube is losing usable output progressively rather than failing suddenly. | Normal tube aging, gas degradation, cathode wear, excessive operating current, overheating, or poor cooling-water quality. | Review operating current and duty cycle, inspect water temperature and flow, and compare present cutting performance with maintenance records. | Improve cooling and operate within rated limits. If output does not recover, plan replacement because an aging tube is usually not repairable. | Medium |
| The tube works when cold but stops after several minutes | Heat is causing the tube, power supply, or cooling system to move outside its operating range. | Insufficient water flow, high coolant temperature, blocked tubing, air bubbles, pump failure, or thermal stress in the tube. | Monitor coolant temperature, verify continuous flow, remove trapped air, inspect tubing for restrictions, and confirm that the pump and radiator are operating. | Stop operation until cooling is restored. Repeated overheating can permanently shorten tube life or crack the glass. | High |
| The tube will not fire unless the current or power setting is increased unusually high | The tube is becoming difficult to ionize or the power-control system is not delivering the expected drive. | Aged or depleted tube, incorrect minimum-current setting, unstable power supply, poor electrical connection, or excessive gas pressure variation. | Verify the controller’s minimum and maximum settings, inspect connections, and measure operating current with suitable equipment. | Do not compensate by exceeding the tube’s rated current. Test the power supply and replace the tube if it has reached the end of its service life. | High |
| The discharge is uneven, flickering, or changes shape during operation | The gas discharge is unstable, which can cause inconsistent power and cutting quality. | Unstable power supply, loose high-voltage connection, moisture or contamination, gas depletion, or internal tube damage. | Inspect low-voltage control wiring, observe coolant flow, look for moisture near electrical connections, and check whether the power supply is regulating current correctly. | Stop using the machine if arcing or abnormal sounds occur. Have the high-voltage circuit and tube assessed by a qualified technician. | High |
| Visible arcing, snapping sounds, or blue-white flashes near the tube terminals | High voltage is jumping to an unintended path. | Moisture, contamination, damaged insulation, incorrect terminal sealing, excessive voltage, or a cracked tube connection. | After disconnecting and safely discharging the equipment, inspect for carbon tracking, wet surfaces, damaged insulation, and cracked terminal areas. | Do not operate the laser. Keep the enclosure closed and use a qualified high-voltage technician for repair and insulation testing. | Critical |
| The tube glows or discharges even when the laser command is off | The power supply may be receiving an unintended enable signal or may have an internal fault. | Shorted control line, incorrect wiring, failed controller output, stuck enable circuit, or defective power supply. | Verify the machine’s enable and PWM/control signals with power isolated where possible. Inspect for wiring shorts and incorrect polarity. | Disable the system immediately. Do not bypass interlocks; have the control circuit and power supply inspected. | Critical |
| A crack, white stress mark, or coolant leak is visible in the glass tube | The sealed tube or water jacket has been mechanically compromised. | Impact damage, thermal shock, excessive mounting pressure, freezing coolant, or internal glass stress. | Turn off power and coolant circulation if safe. Inspect the full tube length, fittings, mounting points, and surrounding electronics for liquid exposure. | Replace the tube. Do not energize a cracked or leaking tube because coolant and high voltage can create a severe hazard. | Critical |
| The tube output is normal at low power but becomes unstable at higher power | The system is reaching a thermal, electrical, or current-regulation limit. | Power supply overloading, inadequate cooling, excessive current, aging tube, or poor control-signal calibration. | Compare actual current with the tube rating, monitor coolant temperature, inspect the power supply’s fault indicators, and verify the control signal. | Reduce power to a safe rated level and correct the cooling or control issue before further operation. | High |
| The laser fires, but cuts are weak, inconsistent, or vary across the work area | The tube may be producing reduced power, but beam alignment and optics can create similar symptoms. | Aging tube, misalignment, dirty optics, damaged focusing lens, incorrect focus, unstable material motion, or inadequate air assist. | Test power at a consistent location, inspect and clean optics, verify focus and alignment, and compare results at several power levels. | Rule out alignment, focus, optics, and material settings before condemning the tube. Replace the tube only after those checks are satisfactory. | Medium |
| The tube output changes when the water hoses are moved | Coolant flow or electrical insulation is being affected by hose position. | Kinked hose, trapped air, loose fitting, coolant leak, hose tension on the tube, or moisture reaching a high-voltage connection. | Inspect hose routing, flow direction, bubbles, fittings, and wet areas. Ensure hoses do not pull against the glass or terminal connections. | Stop operation, correct the hose routing, dry the electrical area completely, and test for leaks before restarting. | High |
| A new tube appears to work poorly immediately after installation | The issue may be installation-related rather than a defective tube. | Incorrect polarity or wiring, trapped air, wrong water-flow direction, improper mounting, misalignment, incompatible power-supply settings, or shipping damage. | Verify terminal connections, tube orientation, cooling flow, mounting supports, rated current, and beam alignment. Inspect for cracks before applying power. | Correct installation errors before increasing power. If physical damage is present, document it and contact the supplier or service provider. | High |
| The tube performs normally, but the machine reports a water-flow or temperature fault | The safety monitoring circuit is preventing reliable operation even though the tube can still fire. | Flow sensor fault, low coolant level, restricted tubing, failing pump, excessive coolant temperature, or a faulty interlock circuit. | Confirm coolant level, flow rate, temperature, pump operation, sensor wiring, and filter or tubing condition. | Correct the cooling fault and keep the protection circuit active. Never bypass a water-flow or temperature interlock. | High |
| The tube has a strong discharge but produces a small or poorly focused spot | The tube may be functioning while the beam path or focusing system is defective. | Misaligned mirrors, dirty or damaged focusing lens, incorrect lens installation, loose optical mount, or beam clipping. | Inspect the lens and mirrors, verify mount stability, check alignment at multiple positions, and confirm the correct focal distance. | Service the optical path before replacing the tube. A tube replacement will not correct an alignment or lens problem. | Medium |
Safety note: A laser tube system can contain lethal high voltage even after the machine is switched off. Only trained personnel should test high-voltage components, and protective interlocks should never be bypassed.
Related Posts
-
10 Essential Tips for Choosing the Right Laser Tube for Your Project?
-

Top CNC Cutting Techniques for Efficient Manufacturing Solutions?
-

Top Benefits of Fiber Laser Tube Cutting Machines for Precision Engineering?
-

2026 Top Trends in Laser Cutting and Bending Technology?
-

What is a CNC Laser Cutter? Benefits, Uses, and How It Works Explained
-

Why Choose Fiber Laser Cutting Machines for Your Business?